Frågor att svara på under dagens två lektionspass: 1. Vad är React.js? 2. Vad är React Native? 3. Varför ska man använda dem och i vilken situation använder man React Native istället för React.js? 4. Vad är ett JavaScript Bibliotek (library)? 5. Vad är ett JavaScript Ramverk (Framework)? 6. Vad är skillnaden mellan ett bibliotek och ett ramverk? Läs t ex Libraries vs Frameworks: https://medium.com/datafire-io/libraries-vs-frameworks-626cdde799a7 7. Vad menas med uttrycket “Vanilla JavaScript”? 8. Vad är npm och vad används det till? 9. Vad är Expo och varför kan det vara bra att använda det när du ska utveckla en mobilapp? 10. Ge exempel på en mobilapp som du skulle vilja lära dig att utveckla. Vad skulle den ha för funktion och varför skulle du vilja utveckla den?
React Native låter dig bygga mobilappar med bara JavaScript. Den använder samma design som React, så att du kan komponera ett riktigt mobilt användargränssnitt från deklarativa komponenter.
import React, { Component } from 'react';
import { Text, View } from 'react-native';

class WhyReactNativeIsSoGreat extends Component {
  render() {
    return (
      <View>
        <Text>
          If you like React on the web, you'll like React Native.
        </Text>
        <Text>
          You just use native components like 'View' and 'Text',
          instead of web components like 'div' and 'span'.
        </Text>
      </View>
    );
  }
}
En React Native-app är en riktig mobilapp
Med React Native bygger du inte en ”mobil webbapp”, en ”HTML5-app” eller en ”hybrid-app”. Du bygger en riktig mobilapp som inte kan skiljas från en app byggd med Objekt-C eller Java. React Native använder samma grundläggande UI-byggstenar som vanliga iOS- och Android-appar. Du sätter bara ihop de byggstenarna med JavaScript och React.
import React, { Component } from 'react';
import { Image, ScrollView, Text } from 'react-native';

class AwkwardScrollingImageWithText extends Component {
  render() {
    return (
      <ScrollView>
        <Image
          source={{uri: 'https://i.chzbgr.com/full/7345954048/h7E2C65F9/'}}
          style={{width: 320, height:180}}
        />
        <Text>
          On iOS, a React Native ScrollView uses a native UIScrollView.
          On Android, it uses a native ScrollView.

          On iOS, a React Native Image uses a native UIImageView.
          On Android, it uses a native ImageView.

          React Native wraps the fundamental native components, giving you
          the performance of a native app, plus the clean design of React.
        </Text>
      </ScrollView>
    );
  }
}
Slösa inte tid med att kompilera om
Med React Native kan du bygga din app snabbare. Istället för att kompilera om kan du ladda om din app direkt. Med Hot Reloading kan du till och med köra ny kod medan du behåller ditt applikationsläge.
Använd ”native code” när du behöver
React Native kombineras smidigt med komponenter skrivna i Objekt-C, Java eller Swift. Det är enkelt att lägga in direkt körbar kod (anpassad för det specifika operativsystemet och hårdvaran) om du behöver optimera några aspekter av din applikation. Det är också lätt att bygga en del av din app i React Native och en annan del av din app med direkt körbar kod – det är så Facebook-appen fungerar.
import React, { Component } from 'react';
import { Text, View } from 'react-native';
import { TheGreatestComponentInTheWorld } from './your-native-code';

class SomethingFast extends Component {
  render() {
    return (
      <View>
        <TheGreatestComponentInTheWorld />
        <Text>
          TheGreatestComponentInTheWorld could use native Objective-C,
          Java, or Swift - the product development process is the same.
        </Text>
      </View>
    );
  }
}
Ett tips är att använda Expo som utvecklingsmiljö. Det är det snabbaste sättet att bygga en riktigt bra app med tillgång till enhetens funktioner som kamera, plats, aviseringar, sensorer, haptik och mycket mer, allt med universella API: er. Här är en lista på tutorials och exempelkod för olika appar med React Native och Expo från Expos blog:
A list of the examples and tutorials published on the Expo blog (last updated January 09, 2019).
Thanks to our talented and prolific developer community, we’ve been able to highlight a bunch of great examples and tutorials on our Expo blog. Here’s a running collection, grouped by type.
13 recipes from building four React Native apps with Expo, including: ◦ Geolocation nearby search in React Native ◦ Uploading assets directly from React Native to Firebase Storage ◦ “I just need a button”, handling common user interactions ◦ Straightforward Animated ◦ Using your own custom vector icons ◦ Analytics, crashlytics and ads ◦ Do your self a favor, aggregate third-party packages ◦ Coloring Lottie animations ◦ Geolocation permissions, the cross-platform way ◦ Smooth animations with setNativeProps where appropriate ◦ RTL layouts without I18nManager ◦ Fixing strange paddings in view layouts ◦ infoPlist your permissions (your app will be rejected otherwise)
På denna sida hittar du en lista på de drönare IKT-Labbet har för användning i undervisning. För mer information gällande respektive modell finns länkar till andra sidor eller så är det bara att Googla eller söka efter informationsfilmer på Youtube.
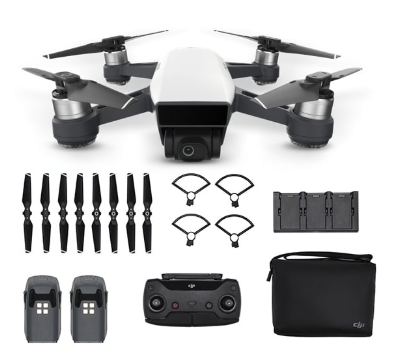
DJI Spark
DJI Spark
DJI Spark drönare är liten nog för att startas från din handflata och levererar en exceptionell bild och videoinspelning. Drönaren är utrustad med en kamera med 1/2.3” sensor som spelar in Full HD 1080p videos vid 30 fps eller 12 MP stillbilder.
Produktegenskaper
Spela in video i Full HD 1080p
Upp till 2km räckvidd
Hastighet upp till 50km/h
16 minuters flygtid på en laddning
2-axlad gimbal
12 Megapixels stillbilder
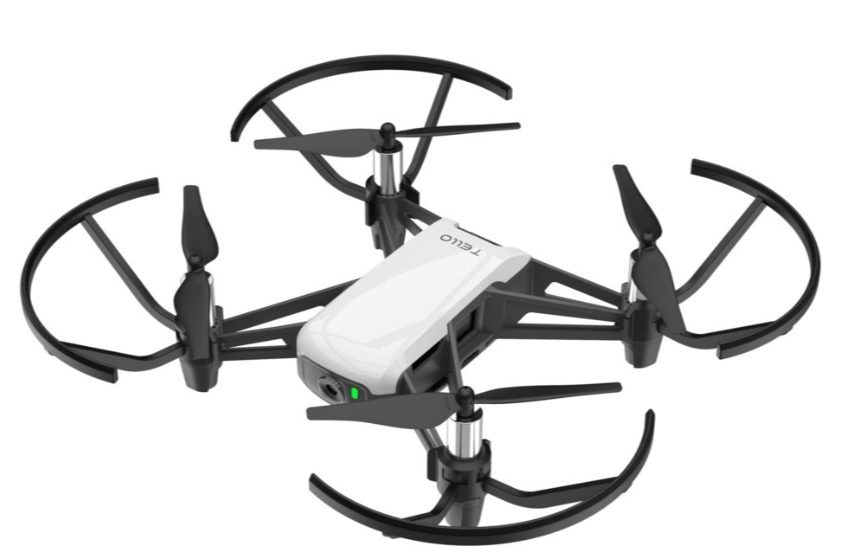
Ryze Tello Powered By Dji Drönare
Ryze Tello Powered by DJI
Lättflugen drönare med kamera
Styrs direkt med mobilen
Kan programmeras
Gör tricks i luften
Självstabiliserande och lättflugen nybörjardrönare. Styrs på mobilskärmen med Ryze-appen där också bilden från drönaren visas. Kan användas med trådlös handkontroll, starta och landa i handen och har sensorer för kollisionsfri flygning.
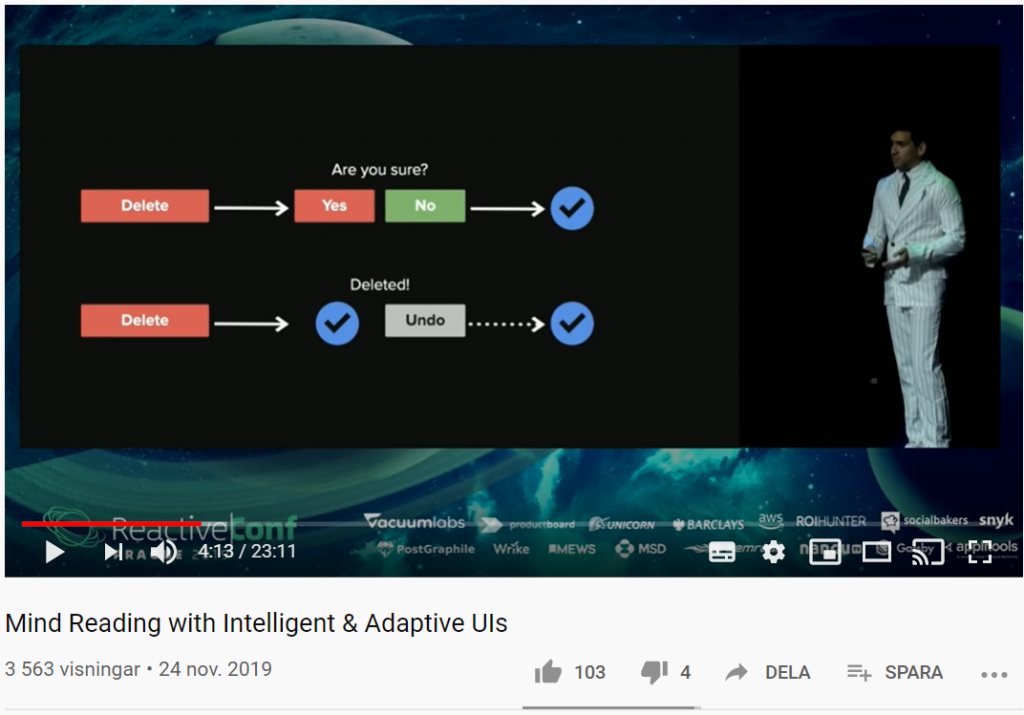
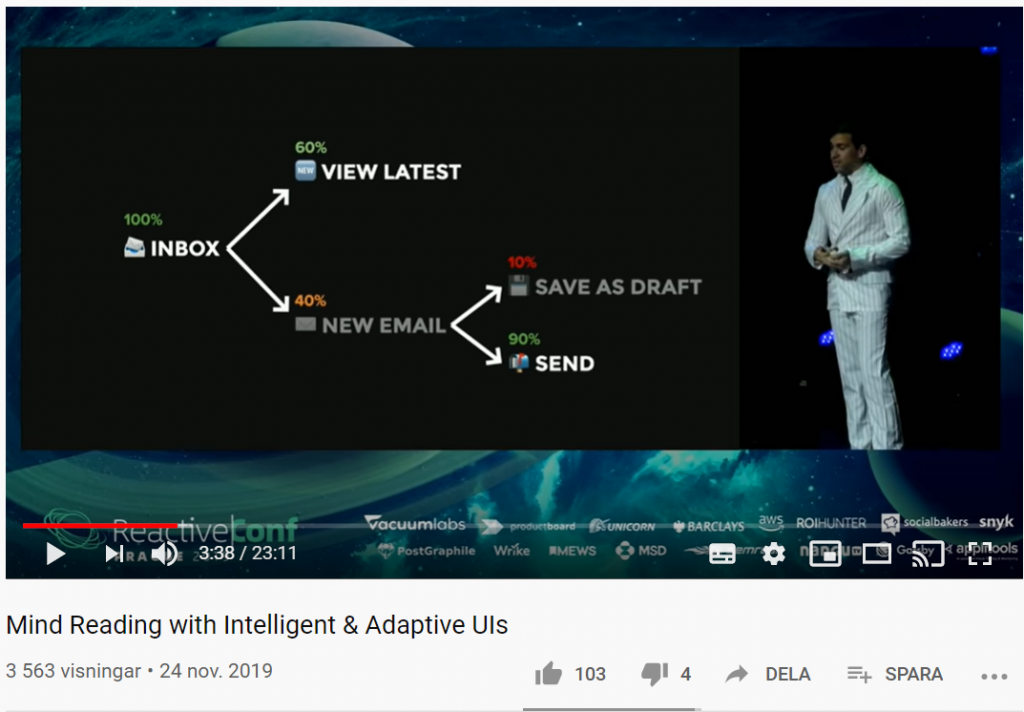
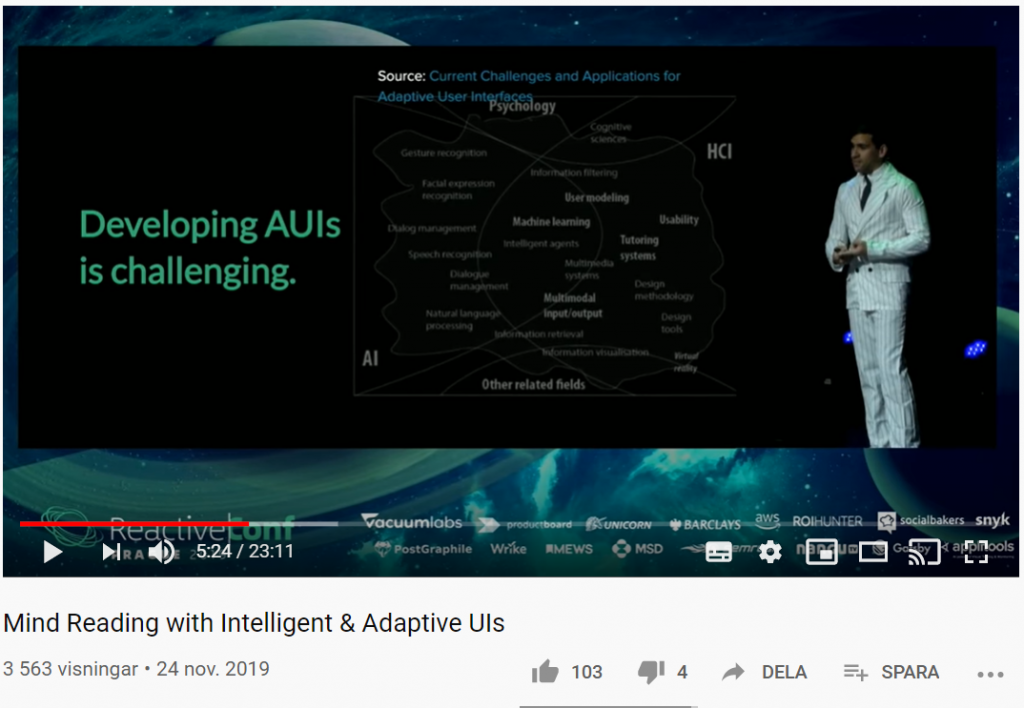
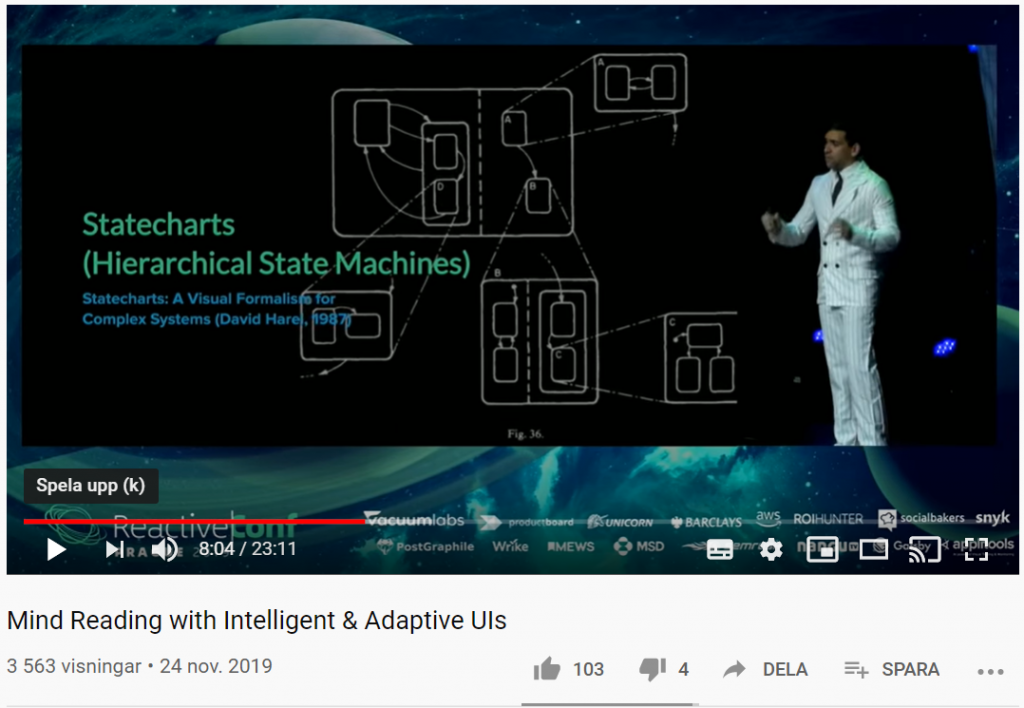
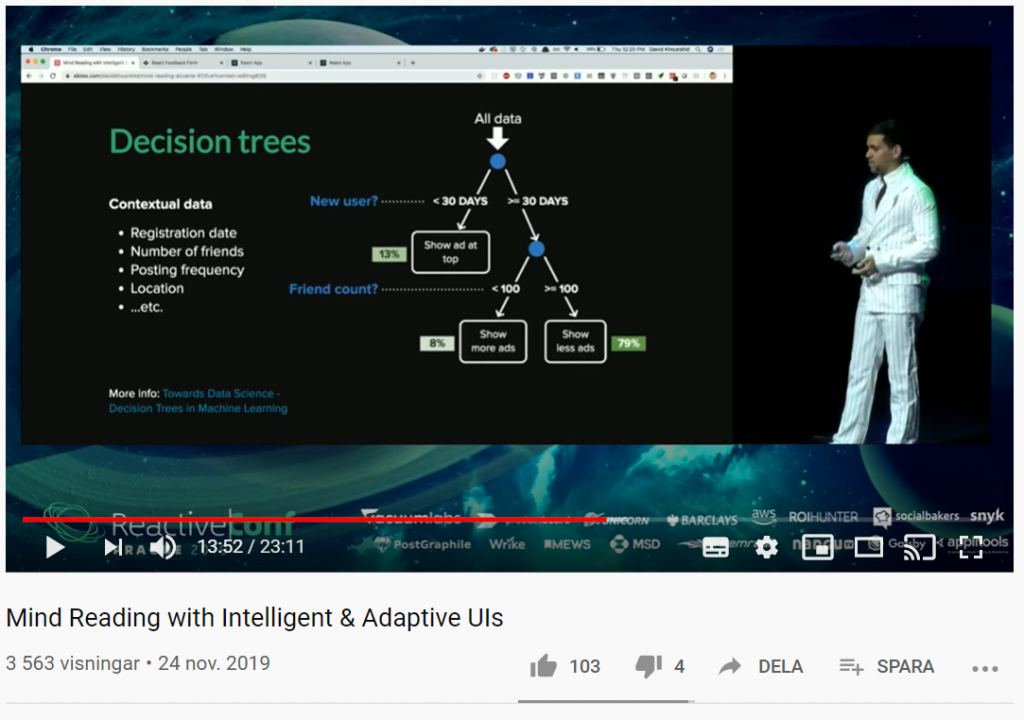
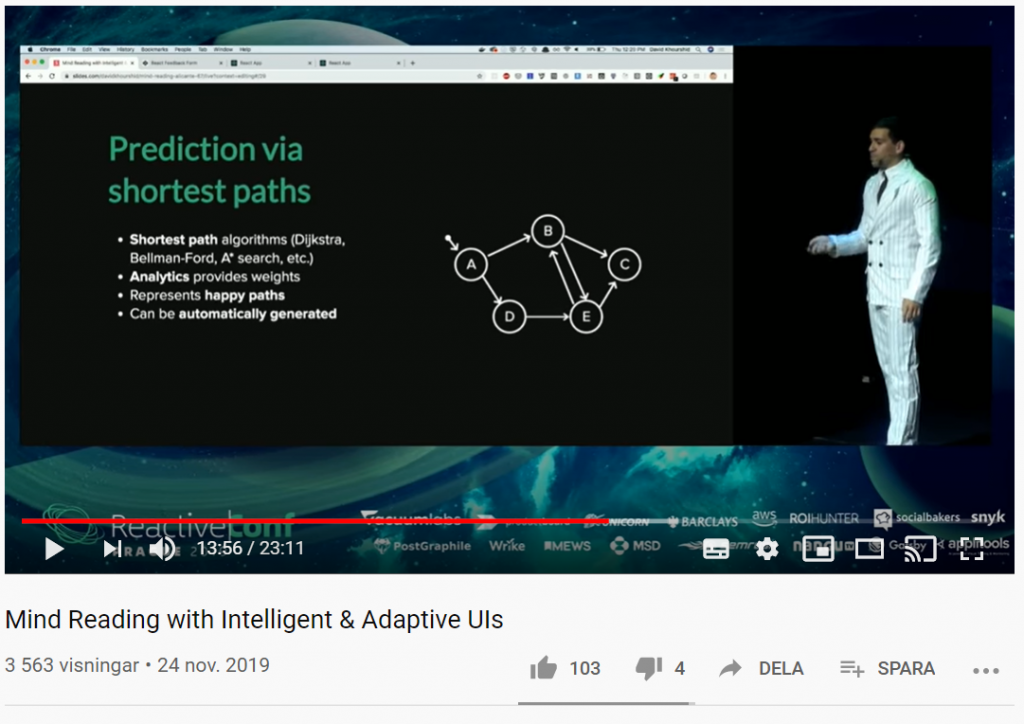
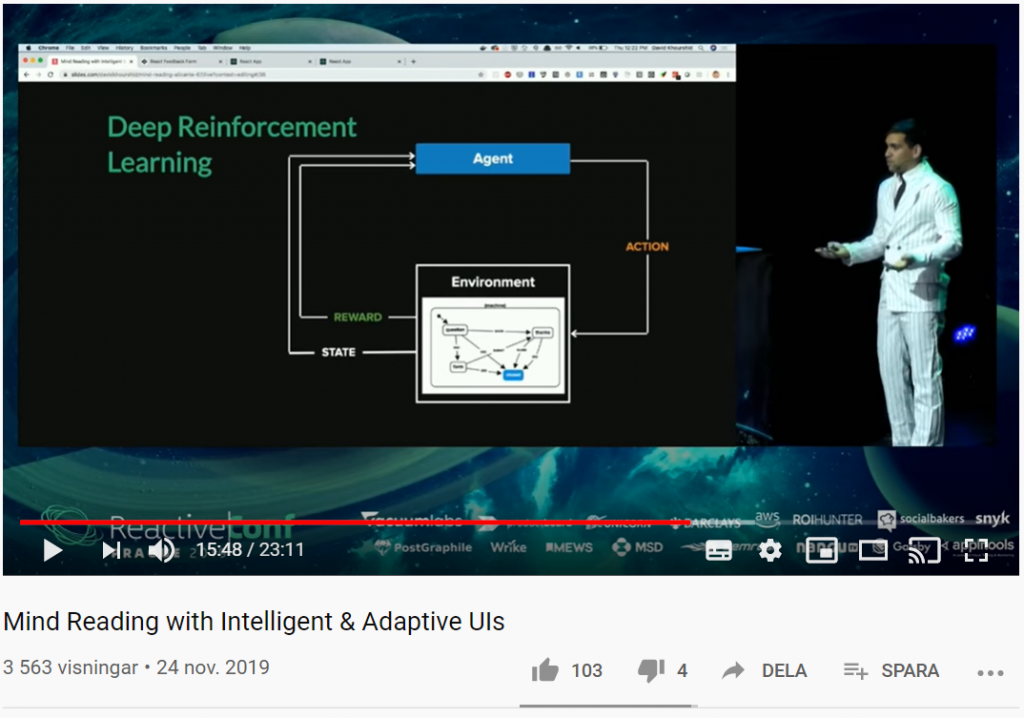
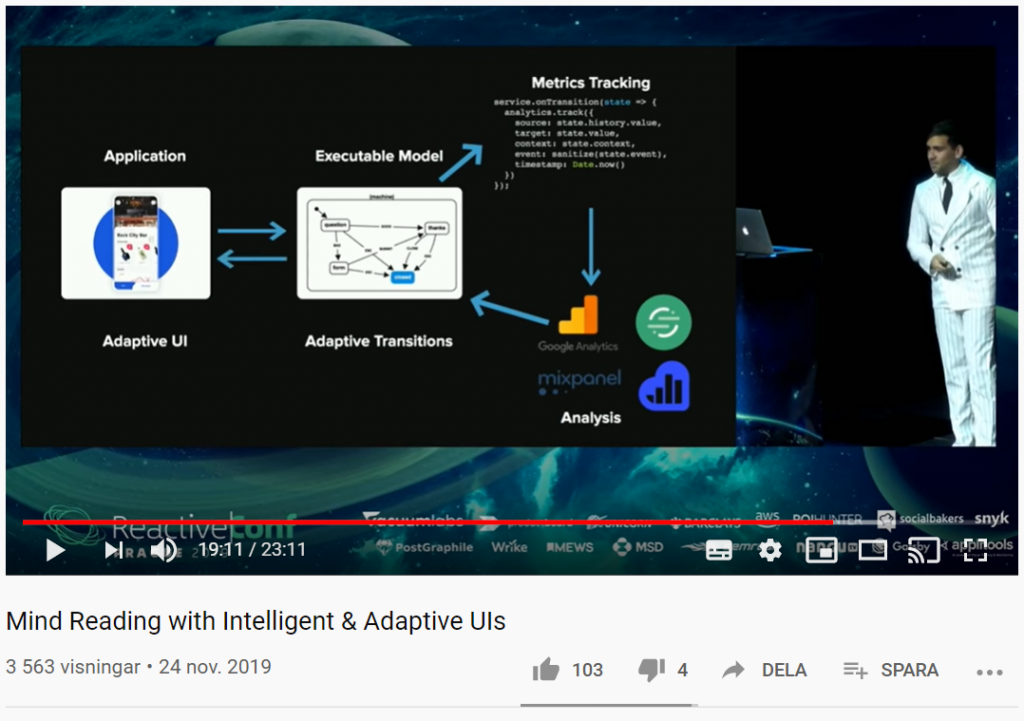
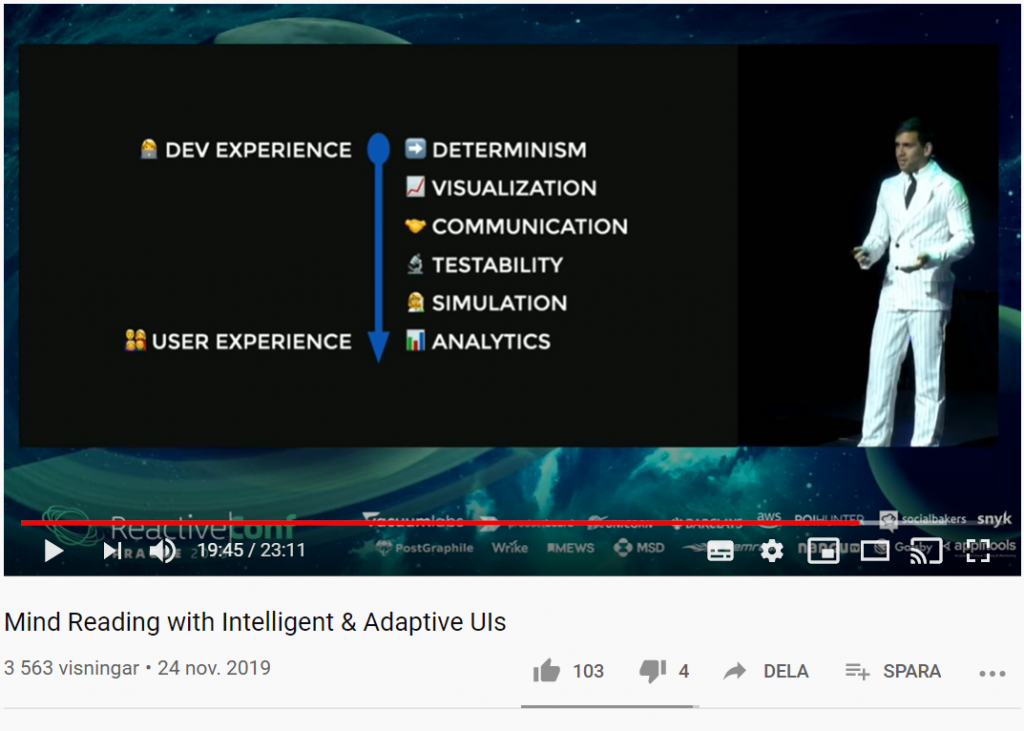
Vad händer om du kan förutsäga användarnas beteende med smarta användargränssnitt? Med sannolikhetsstyrda statecharts, beslutsträd (decision trees), förstärkt inlärning (reinforcement learning) och mer, kan UI:s (User Interfaces) utvecklas på ett sådant sätt att de automatiskt anpassar sig till användarens beteende.
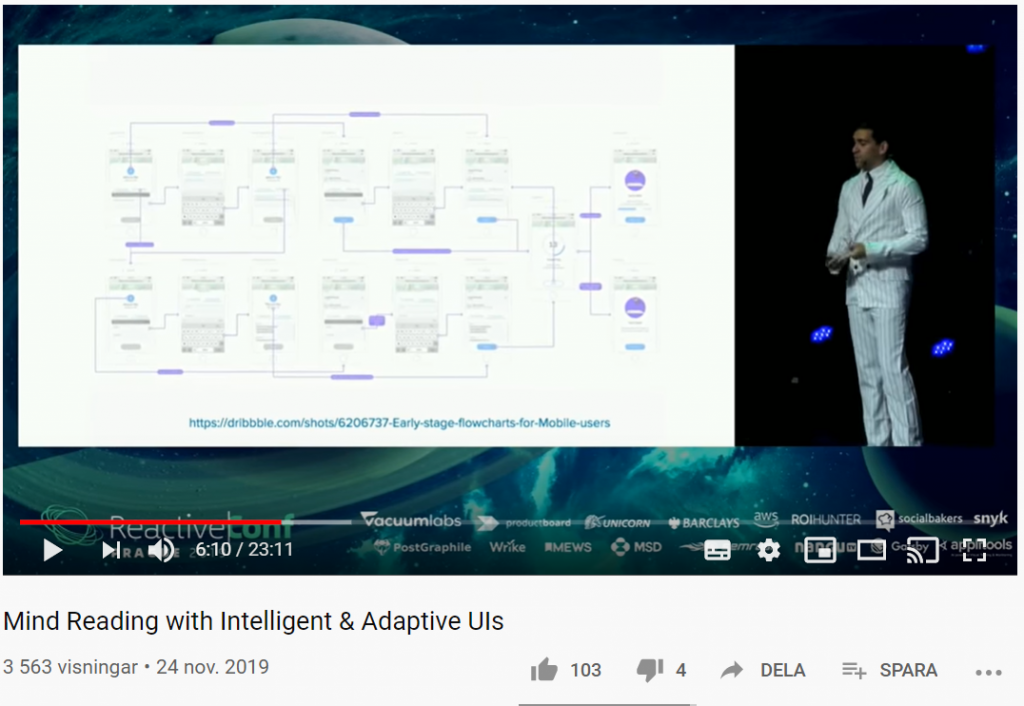
I filmklippet nedan kommer du få se hur du kan skapa anpassningsbara och intelligenta användargränssnitt som lär sig hur individuella användare använder dina appar och anpassar gränssnittet och funktionerna just för dem i realtid.
Med TensorFlow.js kan du snabbt och enkelt skapa webbapplikationer som använder Artificiell Intelligens (AI) och Machine Learning (ML) med ett fåtal rader JavaScript-kod. Det finns en hel del färdigbyggda och förtränade ML-modeller med JavaScript API:er som du kan använda direkt för tillämpningar som t ex: Image Classification Image Segmentation Object Detection Pose Detection Speech Commands Text Classifications Augmented Reality Gesture-based interaction Speech recognition Accessible web apps Sentiment analysis, abuse detection Conversational AI Web page optimization m.m.
I somras hörde en journalist från UR av sig med frågor gällande programmering i skolan. En vecka i början av september fick jag och mina elever på Getingeskolan ett trevligt besök under en tekniklektion. I bifogad länk nedan går det nu i efterhand att lyssna på radioprogrammet.
I reportaget finns en hel del bra tips till lärare, skolledare och huvudmän!
Sedan hösten 2018 ska alla skolor undervisa i programmering. Inför omställningen fanns en oro att skolorna inte skulle hinna med att fortbilda sina lärare. Det fanns också en osäkerhet kring hur undervisningen i programmering egentligen skulle gå till. Så hur ser det ut ett år efter införandet av programmering på schemat? Vad är det eleverna får? Och har lärarna hunnit lära sig det de ska lära ut?
Connector for optional ultrasonic sensor or I2C breakouts (fully compatible with Pimoroni’s Breakout Garden range)
The Microbit pins 0, 1, 2, Gnd and 3V are available for use with croc clips etc.
Lots of mounting holes to create your own “body” for the robot or additional sensors etc.
Makecode extension and micropython examples available
* Wheels need pushing on and optional pen-holder needs screwing in if purchased
Assembly Instructions
Push on the wheels
If you have the pen holder, then use 2 screws to screw the two pillars into the main board from the bottom, then use the remaining 2 screws to screw the top holder into the pillars
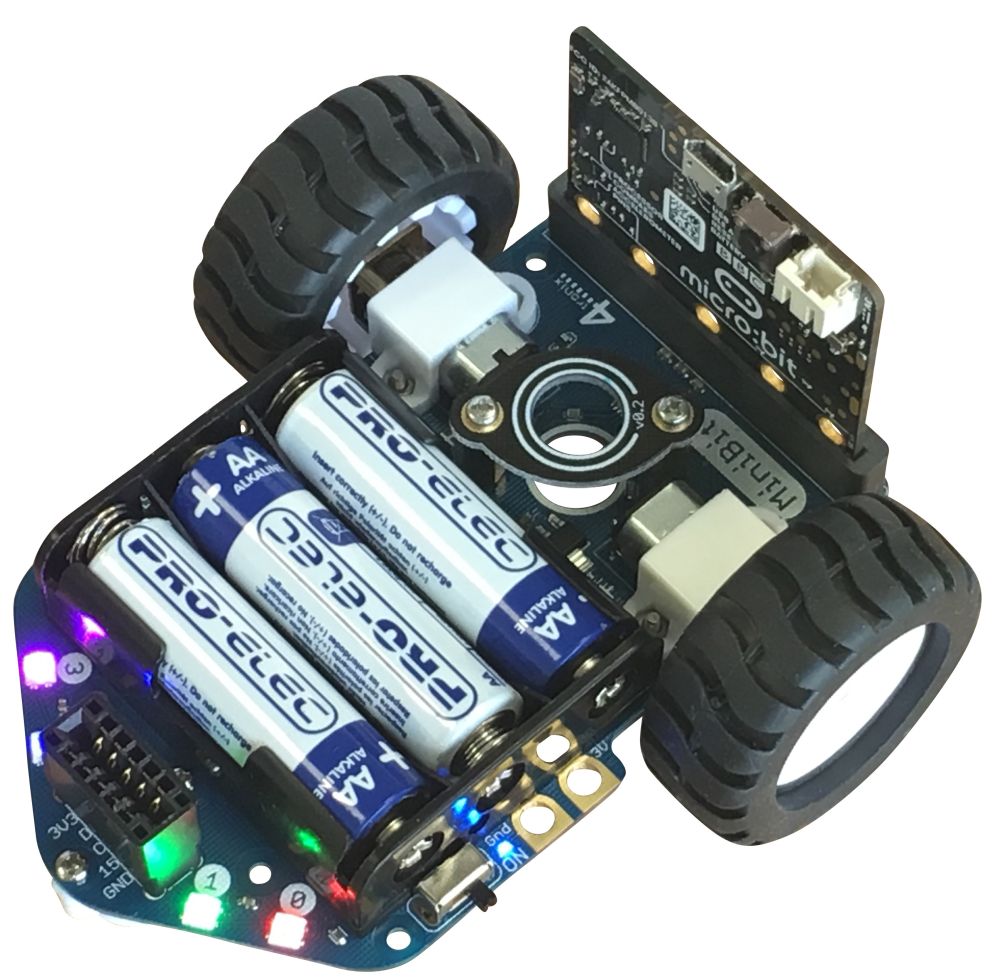
Coding Your MiniBit
Microsoft MakeCode
Click any image to enlarge.
To load the extension, select Advanced, then Extensions. Then enter “Minibit” into the search box and press Enter. If that doesn’t find it (there are sometimes earch glitches) you can enter the full URL into the search box: “https://github.com/4tronix/MiniBit”
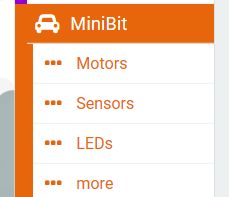
Once loaded, you will have a MiniBit menu item with 4 sub-folders:
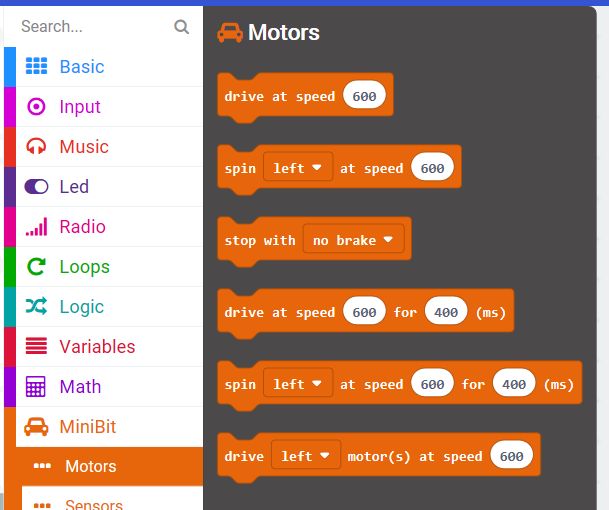
Motor Blocks
The first command “Drive at speed 600” will set both motors to speed 600. If you do nothing more, the MinBit will continue going forward forever.
The speed value can be from -1023 (full speed reverse) to 1023 (full speed forward). Setting the speed to 0 will stop the motors
There is also a block for spinning – left motor and right motor turn at the same speed but in opposite directions.
Both the drive and spin blocks have a paired block that will drive (or spin) for a selected amopunt of time and then stop
There are two ways of stopping. Coasting to a stop or braking. If you set the speed to 0 or use the “stop with no brake” command, then it will stop gently over the coourse of a second or so 9depending on initial speed). If you use the “stop with brake” block (or the drive/spin for a time block) then it will stop almost immediately.
Finally, you can drive each motor individually. For instance if you set the left motor to drive at 600 and the right motor to drive at 1000, then it will perform an arc towards the left
LED Blocks
You can use these blocks to set and clear one or all the LEDs.
Note that the MiniBit defaults to automatically updating the LEDs whenever any change is made see the “more…” section to learn how and why to change this behaviour
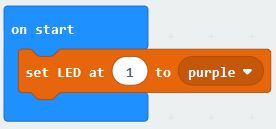
The LEDs on the MiniBit are labelled from 0 to 3. Use these numbers in the Makecode blocks to change the colour. eg setting LED 1 to Purple could be done like this:
The default brightness level is 40. This is plenty bright enough for most uses, saves damaging eyes, and reduces battery consumption. If required you can change the brightness from 0 up to 255
Sensor Blocks
Only one sensor in here; the ultrasonic distance sensor. You can get the values to the nearest object in cm, inches or microseconds
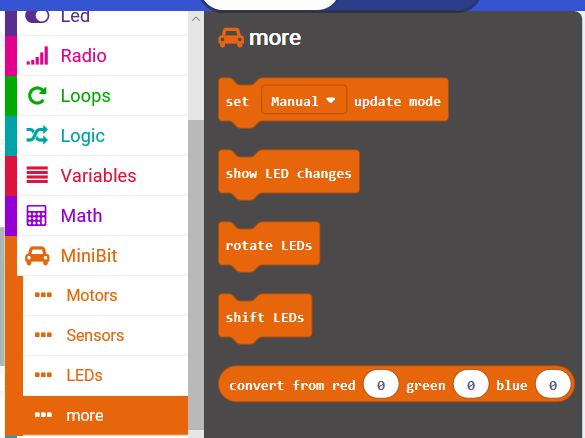
More Blocks
These are the advanced usage blocks. Most students will not need to use them.
Set update mode is used to switch between automatic LED updates or manual LED updates. The default is for automatic updates: every change to the LEDs results in all the LEDs being written to with the updated values. This is easy to understand, but it does mean that when making a lot of changes it can slow things down considerably. If doing that, it is best to use Manual update mode, make all the changes required, then use the show LED changes block to make all the updates in one go.
Rotate LEDs block will move the colour in LED 0 to LED 1, LED1 to LED2, LED2 to LED3 and LED3 to LED0. If done repeatedly, with a delay between each one, it will show the lED colours rotating around all the 4 LEDs.
Shift LEDs block will move LED0 to LED1, LED1 to LED2 and LED2 to LED3. It will blank LED0. So all the colours will disappear one at a time from 0 to 3
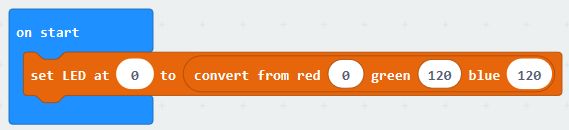
You can also create your own colours and replace the fixed list of colours in any command using the convert from red, green, blue block. For example, to set LED0 to a blue-green colour:
Programming in microPython
Driving Motors
The motors use 2 pins each to determine the speed and direction. In microPython we use write_analog ( ) to set the first pin to a value between 0 and 1023 and the second pin to 0 in order to go forward. To reverse, we swap the pins so that the first pin is set to 0 and the second pin is set to the value.
On the MiniBit the left motor uses pins 12 and 8, and the right motor uses pins 16 and 14.
So to move the left motor forwards at speed 600:
pin12.write_analog(600) pin8.write_digital(0)
And to move the right motor in reverse at speed 450:
pin16.write_digital(0) pin14.write_analog(450)
To stop with no brake, use write_digital ( ) to set both pins to 0. To stop with brake, set both pins to 1. eg. stop left motor with coasting and right motor with brake:
pin12.write_digital(0) pin8.write_digital(0)
pin16.write_digital(1) pin14.write_digital(1)
So a complete, but fairly useless, program to drive the motors for 2 seconds and then stop quickly, would look like this:
from microbit import * pin12.write_analog(600) pin8.write_digital(0) pin16.write_analog(600) pin14.write_digital(0) sleep(2000) pin12.write_analog(0) # temporary fix for python bug pin12.write_digital(1) pin8.write_digital(1) pin16.write_analog(0) # temporary fix for python bug pin16.write_digital(1) pin14.write_digital(1)
Note the 2 lines that write_analog(0) before swapping a pin from analog to digital. These are required until a fix is obtained for the python PWM driver continually updating the pin type to analog
Lighting the LEDs
This uses the standard neopixel code, with the LEDs connected to Pin 13.
At the top of your program add import neopixel then:
leds = neopixel.NeoPixel(13, 4)
leds is then an array of all 4 LEDs. leds[0] refers to the LED 0 and leds[3] refers to LED3. Each element of the array is a set of 3 numbers representing the Red, Green and Blue values (each 0..255) for that LED. So to set LED2 to Blue:
leds[2] = (0, 0, 255)
All this does is update the array. To show the new value of the array, we need to call the show ( ) function as follows:
leds.show ( )
Reading the Ultrasonic Distance Sensor
The ultrasonic sensor breakout is on pin15.
The concept is simple: send an ultrasonic pulse out, then time how long it takes to return. Using the speed of sound and some maths, we can then work out the distance. The following complete program has 2 parts to it: a function sonar ( ) which returns the distance to the object, and the main code in a loop which continually prints the distance. We also need to import the utime library:
from microbit import * from utime import ticks_us, sleep_us
def sonar(): pin15.write_digital(1) # Send 10us Ping pulse sleep_us(10) pin15.write_digital(0) pin15.set_pull(pin15, NO_PULL) while pin15.read_digital() == 0: # ensure Ping pulse has cleared pass start = ticks_us() # define starting time while pin15.read_digital() == 1: # wait for Echo pulse to return pass end = ticks_us() # define ending time echo = end-start distance = int(0.01715 * echo) # Calculate cm distance return distance